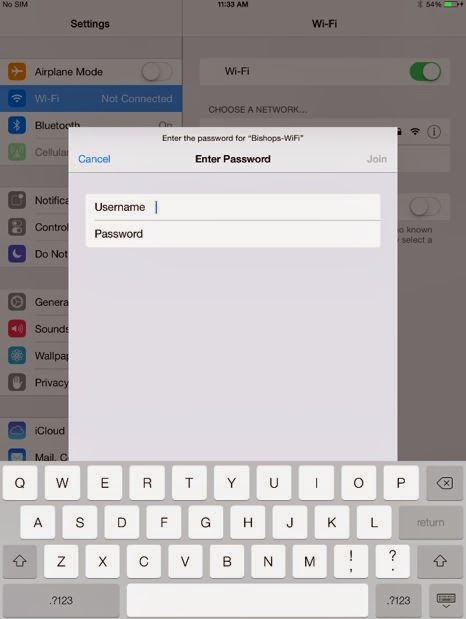
1) Turn your WiFi setting ON in Settings > WiFi
2) Select 'Bishops WiFi' to configure settings
3) Do NOT enter any DHCP or IP settings

4) Under 'HTTP PROXY', select 'Auto' and enter the URL http://intranet/wpad.dat
5) Upon exiting the Wi-Fi Settings page, an authentication prompt appears. Enter your Bishops username and password.
6) A certification prompt will appear. Select 'Accept'
7) After a short period of loading, a tick will appear next to 'Bishops WiFi' as well as the Wifi icon. This indicates that you are connected to the Bishops' Network.
8) If you double tap on 'Bishops-WiFi', you will notice that all the DHCP settings have been automatically set.


